My new Distress Markers arrived this past Friday. I LOVE them and can't put them down. Suddenly it has become clear to me why I hadn't invested in all the hooplah over pens and markers that have wooed the crowds in the past few years. Apparently, I was holding out for these. They play so well with the Distress ink pads. I can stamp my focal image using black Archival, play with the markers, eagerly laying color down on my image, and once I'm satisfied, I apply Distress ink over the image to make my background. I'm so in love! They're very user friendly and the look you can get from them is remarkable. I'm really digging the look of them on watercolor paper when I blend them using a water brush. You can use them on plain old cardstock as well. I invested in the full set and I'm glad I did. I hope you all get yours soon. You're going to love them I promise!
Sunday, April 01, 2012
Saturday, March 31, 2012
Distress’ed Out!
But in a good way! For the past couple of weeks I’ve been taking THE online class by Tim Holtz, Creative Chemistry 101, at onlinecardclasses.com. If you haven’t taken an online class there before, you should, especially this one. I’ve learned SO much and inspiration has come easy taking Professor Tim’s class. Here’s some pics of what I’ve been up to.
Pictures of how I binded all the tags and will store them:
I was so lucky to have made some cupcakes during the class. That’s when I came across the cocoa box and decided to use the empty one as a container for my tags. Very easy to upcycle by using ModPodge and scrapbook paper, ribbon, etc.
Day 2 of CC101:
Day 3 of CC101:
Day 4 of CC101:
On Day 4, I wasn’t able to complete the third tag as I didn’t have any cut-n-dry felt. At this point, I don’t think I’m going to purchase any, so no tag that day—LOL! I might change my mind in the future If I can find another reason to use cut-n-dry felt.
Day 5 of CC101:
Day 6 of CC101:
Day 6 tags are a favorite of mine as I had been waiting for my full set of distress markers to arrive as I had pre-ordered them shortly after CHA. They arrived on the last day of class, so I was able to participate in that portion after all. When they arrived from Absolutely Everything, they were gift wrapped with free goodies, some Perfect Pearl powders, which was a surprise in and of itself as I had only had one color previously, and this was a technique Tim was using in the class!
Day 7 of CC101:
On Day 7, I wasn’t able to complete the third tag as I didn’t have any Distress Embossing Powder, but I plan to make one when I get some as class videos, handouts, etc., will be available to me forEVER!
Day 8 of CC101:
Day 9 of CC101:
Day 10 of CC101:
I’m feeling such a sense of satisfaction upon completion of this class. It was tremendously detail-oriented, complete with techniques and tips I’ve already put in motion with my Ranger supplies and my creative process. The class materials are available to me forever and I think I will be referring to them quite a bit. I highly recommend taking this class—you still can—it just won’t be live. BTW: Tim is one cool dude.
Monday, March 19, 2012
Spring
Even though it feels more like Winter today than ever, I’ve been inspired to complete spring’ish projects. I just can’t use my butterfly punch enough, ya know? I’m sure we’ll be chasing butterflies and bunnies soon. Next week starts Spring Break for my kiddos and I though I’d make a little bitty album now and see if I can’t do some Spring Break scrapping on the fly.
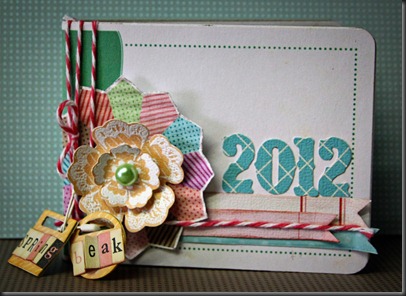
This little chipboard album was pretty easy-peasy to complete. I printed some Elle’s Studio’s “Chic Journaling Tags Daily” (available at jessicasprague.com) coupled with elements made using Elle’s Studio’s “Sweet Summer Papers” kit. To bind it, I used my Your Story binding machine.
This past Sunday, I was inspired to make this week’s featured card from Lily Pad Cards. Watching these videos every Sunday really make my day! My family even watches them with me. Here’s a link: http://www.lilypad.inlinkz.com/. I didn’t have the exact stamp set, so I used the Wildflowers III font for the flowers and LD Modern Print font for the sentiment and printed them on one of Elle's Studio “County Fair Journaling Tags”--what great colors in that kit! Then I used Prisma Color pencils with Le Plume markers to fill in the flowers. Lastly, I applied some glossy accents to the flowers and added i-roc gems.
The "County Fair Journaling Tags" by Elle's Studio can be found at jessicasprague.com.
See what I mean by using my butterfly punch? I’ve been using that thing like crazy lately! Oh my word! Echo Park’s This & That Graceful Kit was released recently at jessicasprague.com. How juicy. My eyes are so pleased with this kit. I used a journaling tag from the kit as the base for my card and utilized some 3D adhesive tabs to give the banner some lift and interest. Some Tim Holtz distress inks were used in the making of the butterfly.
More butterflies with added fairy dust—yum! I used some Hero Arts framelits/stamps and Basic Gray paper to make these chipboard butterflies. I mounted them on a Tim Holtz wood grain embossed tag, put together using some distress inks and pearlized water.
I love printing digital items onto Fabric Stick and making something to use in real life. When I saw the Fancy Circles Digital Brushes by Jodie Lee at jessicasprague.com, I knew I wanted to make a pin cushion—I’ve been needing just one more in my crafty area—and this one makes me proud!
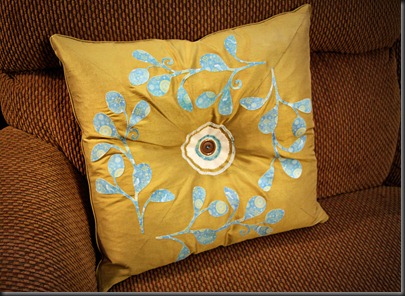
Speaking of sewing projects, this is something I’d been wanting to do for a while, also. Appliqué! This past month, Samantha Walker released some of her digital die cut kits at jessicasprague.com. You should check them out! I used her Floralicious! Digital Die Cut Kit to cut some appliqué from printed Photo Fabric using her Cuckoo 4 U True Blue Paper Pack. So, not only can I print awesome patterned papers onto Photo Fabric but I can use digital die cut kits from jessicasprague.com to make appliqué!
Lots of projects in my future . . .
I hope you enjoyed taking a peek at what I’ve been inspired to make lately. Definitely spring’y.
